The following instructions help you to write your first ESpec project. We would like to create a simple Unit Test that has a single Test Case.
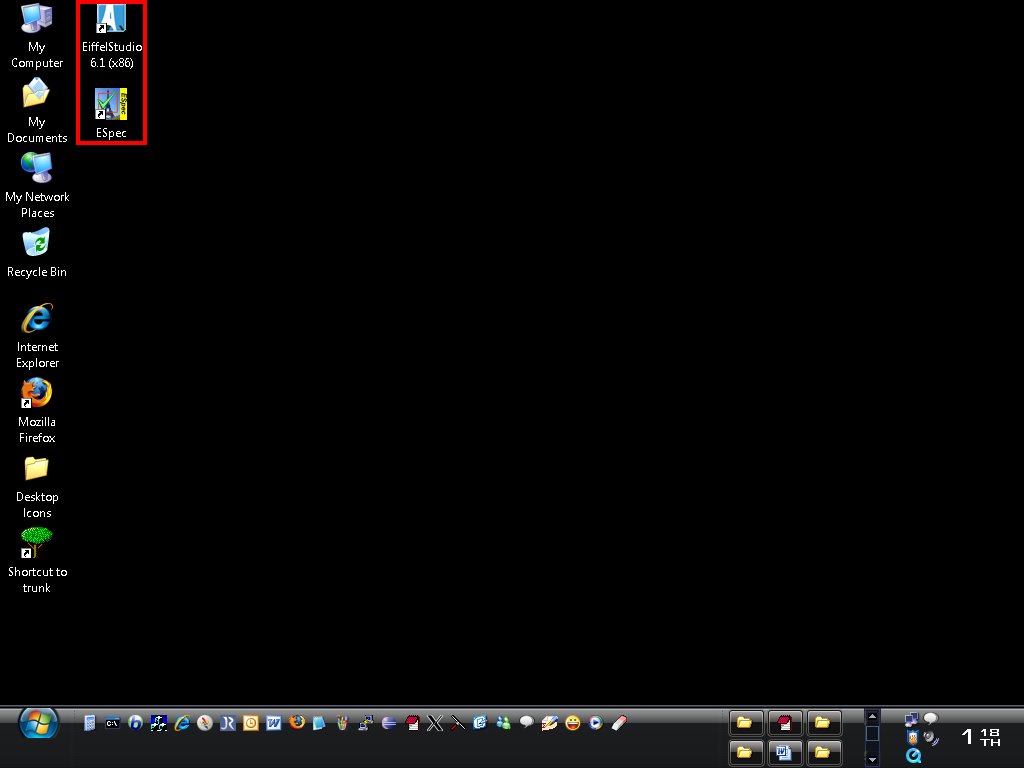
After EiffelStudio and ESpec are installed on your computer, you'll see two icons appeared on your desktop (one for EiffelStudio and one for ESpec).
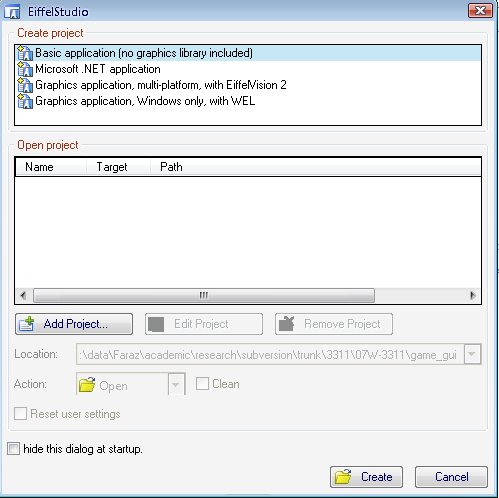
We start by opening EiffelStudio (double click on the icon). When EiffelStudio opens, it allows the user to select the type of the project that he/she desires to create. Select the "Basic application" and press the "Create" button.
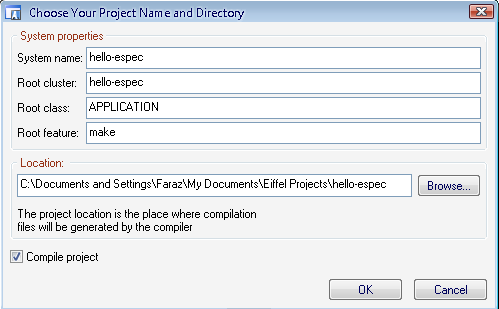
The next step is to provide a name for your Eiffel project. Let's use "hello-espec" as the "System name" (you do not need to modify the other paths for this example). Then press the "ok" button. EiffelStudio then creates a new project named "hello-espec" and automatically includes ESpec library as part of this new project.
After the compilation, you must see the following cluster structure:
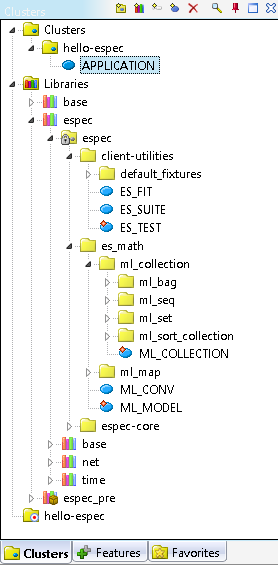
Now it is time to write our first Unit Test. As you can see in the cluster structure above, APPLICATION is the root class of our system. We use this class as our only Unit Test class for now. Obviously, as the system grows you need more Unit Test classes in your system and therefore you have to use a "Test Suite" as the root class of our system instead of a Unit Test. But let's keep it simple for now.
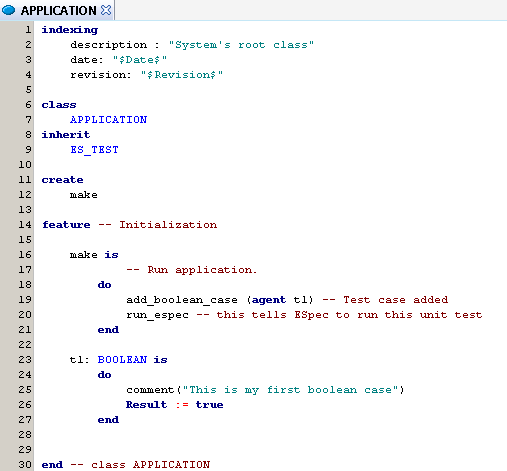
For writing a Unit Test class, we need to inherit from the "ES_TEST" class. This class comes from our ESpec library and allows the developer to write number of Test Cases and bundle them into a Unit Test class. The "make" routine is where we bind the Boolean Test Case to the agent associated with it using the "add_boolean_case" feature. It is important to end the make routine using the "run_espec" command. This command tells ESpec to run the Unit Test class. Furthur down, we can define this Boolean agent (let's say t1) which tests a unit of functionality of the underlying logic. In our example, since there is no underlying application, the Test Case t1 simple passes by setting the value of "Result" to true. The "comment" command allows the user to write a comment for this Test Case. At this point, you should compile the project.
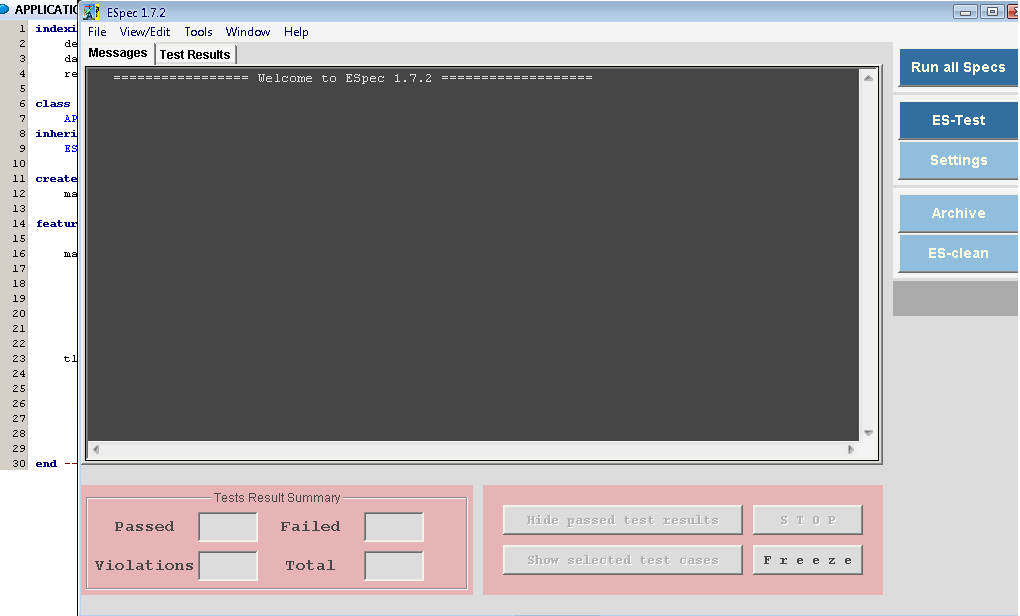
Now we would like to see the test pass. Let's open ESpec by clicking on the ESpec icon on the desktop.

Press the "ES-Test" button or simply press F5. A dialoge asks you to locate the executable associated with your project. This executable will be run by ESpec and the result of tests will be shown in the tool window. The executable file for the project is located in the project directory under EIFGENs/name_of_the_project/W_code (e.g. C:\Documents and Settings\User\My Documents\Eiffel Projects\hello-espec\EIFGENs\hello-espec\W_code\hello-espec.exe).
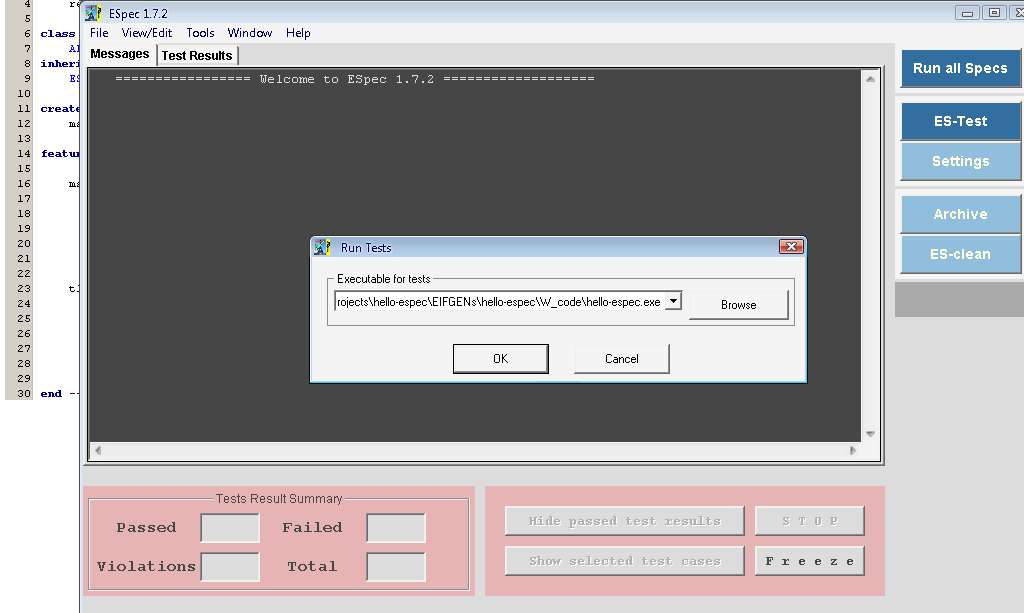
After you located the executable, press the "ok" button to run ES-Test.
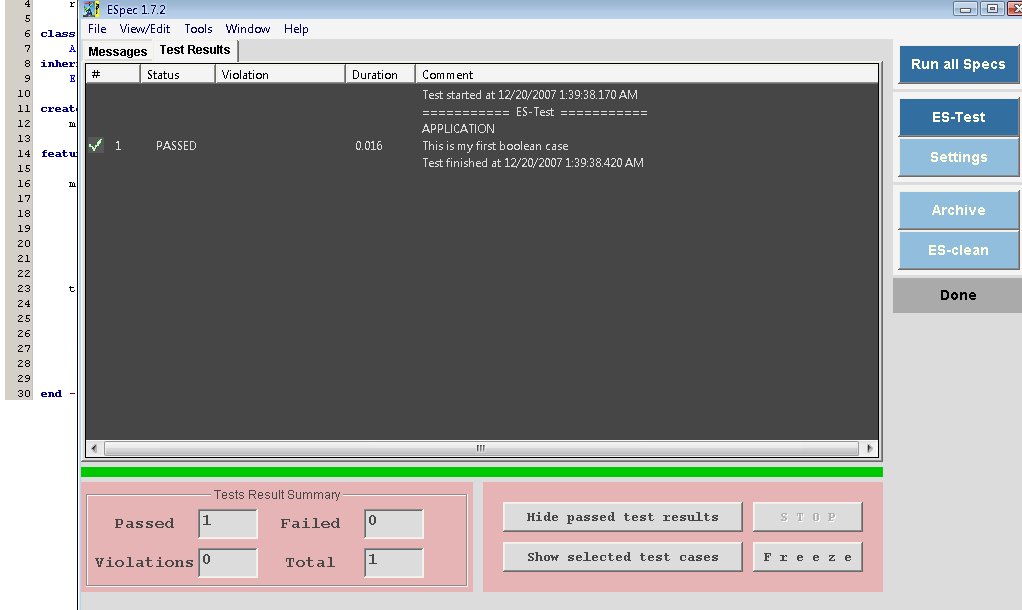
ESpec shows the result of running the Unit Test class which contained only a single Test Case.