These pages describe modifications to the Lab 2 instructions from the course textbook (pages 84—86) for setting up a Windows PC for Java software development. It is assumed that you have the textbook for the course, the CD ROM that accompanies the textbook, and Administrator privileges on the PC.
The textbook recommends installing an editor called Crimson to create and edit your Java source code files. If you want to use this editor then follow the instructions in the textbook.
I would recommed that you install the jEdit editor instead. You can download it here. jEdit is a programmer's text editor written in Java. Because it is written in Java, it runs on all major platforms (Windows, Max OSX, Linux). It is the editor that I will use in class and it is available for you to use in the lab.
Customize jEdit following these steps:
Follow the instructions under the section called The Console.
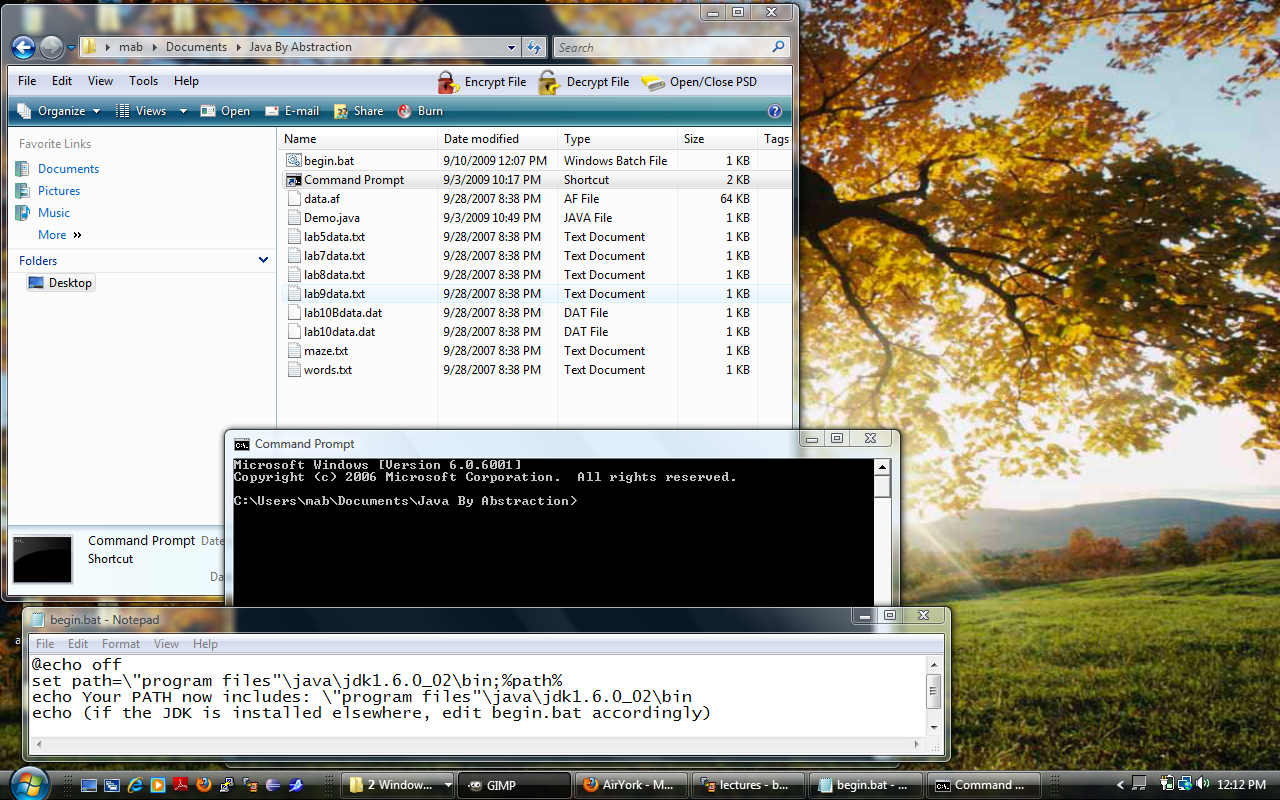
You will need to edit the file named begin.bat in your
Working Directory. Find begin.bat using the Windows file
explorer and right click on it; select the Edit option. Replace all
occurrences of jdk1.5.0_02 with jdk1.6.0_02.
Save the file.
My Working Directory is C:\Users\mab\Documents\Java By Abstraction".
This is the contents of begin.bat, the contents of my Working Directory,
and the Console (Command Prompt) running from the shortcut created in my
Working Directory.
begin followed by the Enter
key.javac Demo.java followed by the Enter
key. Your Console should pause for a second or two and then resume with the normal
command prompt.
'javac' is not recognized
          as an internal or external command, operable program or batch file
then you either forgot to issue the begin command,
or you made a mistake editing your
begin.bat file. You need to fix this problem before
you can proceed.java Demo followed by the Enter
key. Your Console should display the message Welcome to 'Java
by Abstraction'.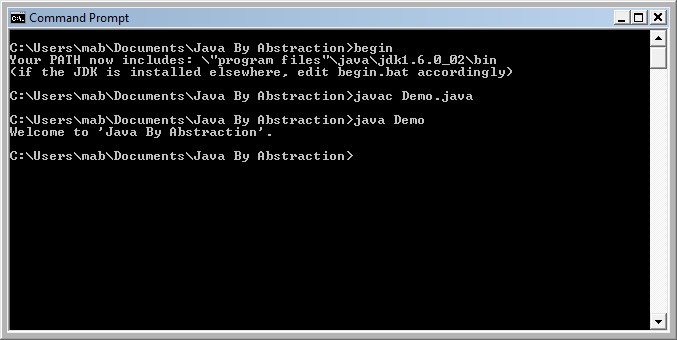
Perform this step after you get a CSE account.
java Options.
Exception in thread
          "main" java.lang.NoClassDefFoundError: Options
then you probably did not install the TYPE
software in the correct location. You need to fix this problem before
you can proceed.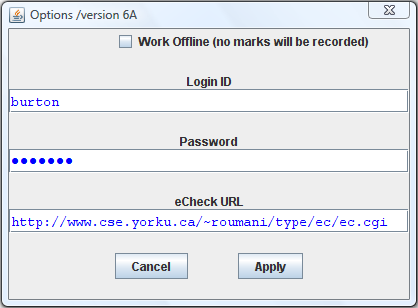
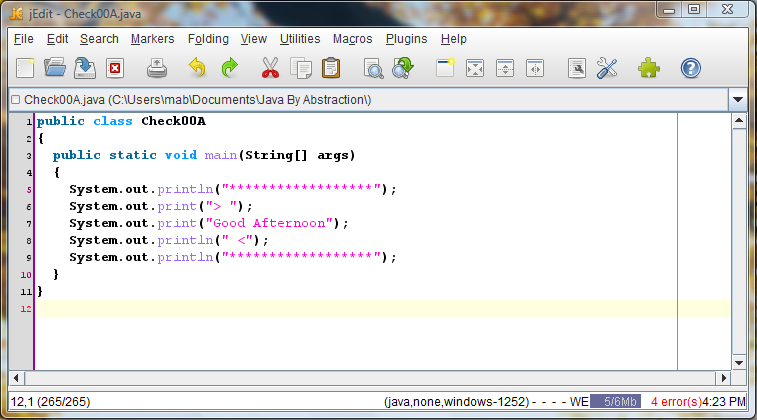
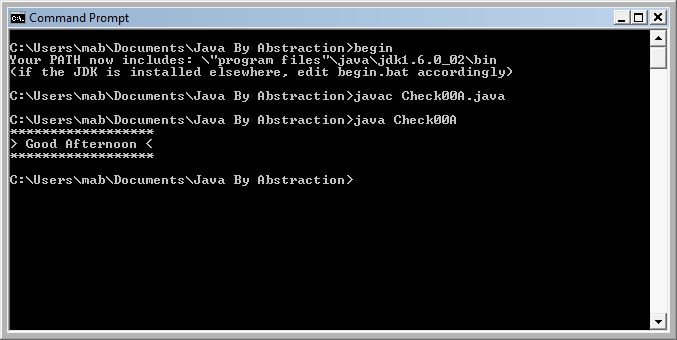
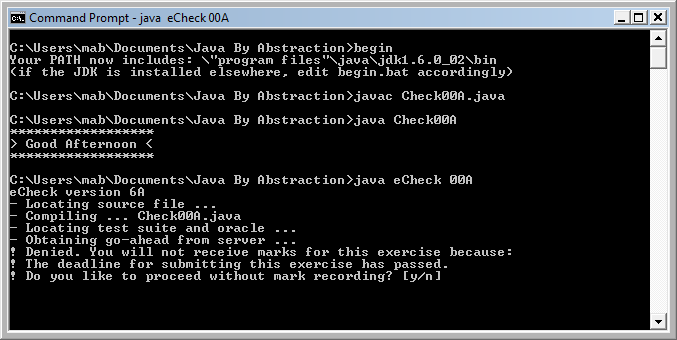
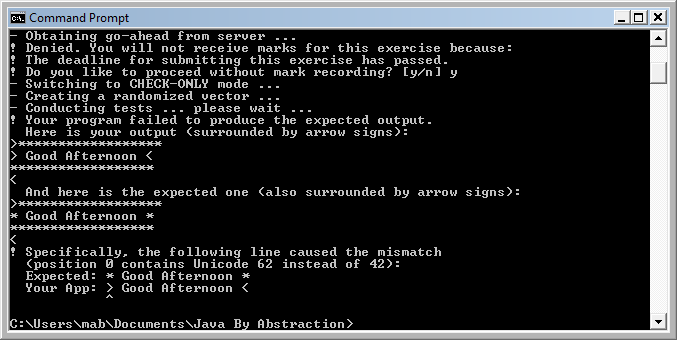
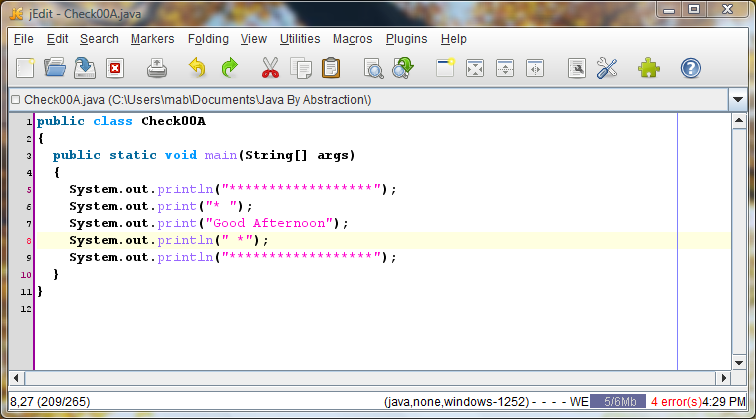
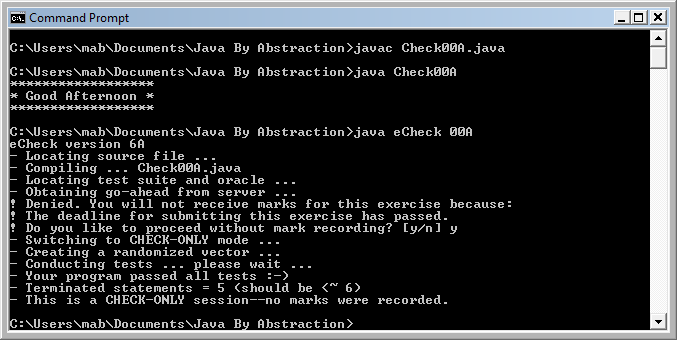
eCheck 00A is on pages 38—40 of the textbook; the steps are illustrated below: